


It is a good thing to understand the servo system, how to use it and its advantages and disadvantages.
This passage is going to talk about the followings of servo motor:
(1) Servos background
(2) How to control amateur servo motors?
(3) What is the difference between and digital servo?
Servo is a motor used to precisely control body movement. This is because they usually move to a certain position instead of continuously rotating. They are ideal for rotating objects in the range of 0 to 180 degrees.
The servo is easy to connect to the arduino and control, because the motor driver is built into the servo system. This means that the driver circuit for driving the motor is internally built into the servo. Therefore we do not have to connect the driver circuit because it is already connected. Therefore, all we have to do is to connect the pins of the servo directly to the arduino board and program it, and that is all we have to do.
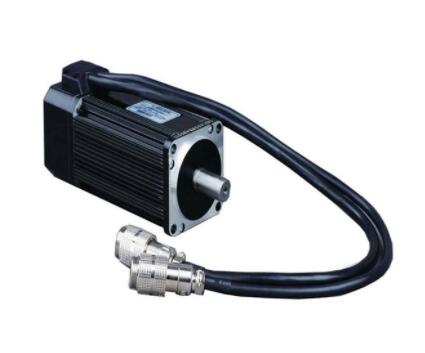
Internally, the servo motor contains a small electric motor connected to the output shaft via gears. The output shaft drives the servo arm and is also connected to a potentiometer to provide position feedback to the internal control circuit.
The continuous rotation servo that disconnects the position feedback can continuously rotate clockwise and counterclockwise while controlling the speed to a certain extent. These functions are similar to brushed motors, except that the continuous rotation servo uses servo library code instead of AnalogWrite and does not require motor shielding. The disadvantage is that compared with external motors, the choice of speed and power is limited, and the accuracy of speed control is usually not as good as the motor cover (because the electronics are designed for precise positioning, not linear speed control).
The amateur servo system has a three-wire connection; the power connection (about +4.8 to 6V DC and 0V connection) and the PWM input connection (which can be driven by a 5V logic level signal), but 3.3V seems to work normally.
Although it is not critical, the PWM rate is about 50 Hz. The high pulse width controls the position of the servo mechanism. Actual values vary greatly from one amateur servo type to another. Sometimes a value between 1000usec and 2000usec (1 to 2msec) is specified to move the servo axis from its extreme clockwise position to its extreme counterclockwise position (viewed from the end of the servo axis). Values outside the range will not cause any other movement. Other amateur servers may use different pulse ranges, such as between 600usec and 2400usec. In most cases, it can be assumed that the center position is obtained with a pulse width of about 1500usec.
It is necessary to generate PWM pulses (at the above 50Hz rate), and the pulse width jitter is small. Otherwise, because the servo amplifier continuously generates voltage to adjust the motor with every small change in the generated pulse, the servo will vibrate noise. width. Although PWM pulses can be generated using only a timer circuit (such as a 555 timer chip), the more popular way is to use a digital circuit or a computer/microcontroller.
Trying to generate PWM pulses in software is not easy, because most computers are not designed to perform such tasks. They will produce slightly varying pulse widths with a lot of jitter! Single-board computers such as Raspberry Pi or BeagleBone Black usually have dedicated circuits inside that can accurately generate pulse sequences. But usually SBC is not designed to control multiple servers at the same time. In addition, their dedicated circuits are used for general-purpose pulse sequences, so some coding is required to make them suitable for the pulse width size required for operation with amateur servos. This is good, but for fast projects, it is sometimes easier to offload PWM generation To the external chip, and whenever you need to change the position of the servo axis, send commands from time to time (using serial interfaces such as I2C or UART).
On the user side, the control method of digital servo is the same as that of analog servo. The difference is how to control the servo motor through the circuit board (amplifier). The analog servo motor receives signals from the amplifier 30 times per second or at a frequency of 30 Hz. This signal allows the amplifier to update the motor position. The digital servo uses a high-frequency amplifier that updates the position of the servo motor at a frequency of 300 Hz or 300 Hz every second. By updating the motor position more frequently, the digital servo can transmit the full torque from the start of the movement and increase the holding power of the servo. Fast refresh also allows the digital servo to have a stricter dead zone.
In addition to higher costs, digital servers only have advantages over analog servers.
Digital microprocessors are 10 times faster than analog servers. From the beginning, the servo deviates all rated torque by 1 degree from the center point, so the response speed is faster. Please note that this faster response will also result in a higher starting current, so please make sure your battery can use it.
The digital servo can be programmed to adjust the direction of rotation, center and end points, fault protection options, speed and dead band bandwidth. This is ideal for a set of servos that match the dead zone width, center point and end point in large aircraft applications, as well as a set of reverse digital servos when using two on a "Y" harness.
