


You can perform many different tests on the motor-that's why it's important to know the purpose of these tests, how they work and what the data means. We will first briefly review why the test is important, then discuss the rotor bar, withstand voltage, surge and motor winding resistance, and discuss vibration analysis. Give your DC motor a test!
This passage is going to talk about the followings of DC motor:
(1) Understanding what is DC motor
(2) How to test DC motor?
(3) Tips and attentions
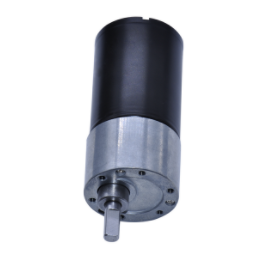
DC orDC motors are the most efficient motors on the market today. Understanding the basic layout of a DC motor can greatly help in troubleshooting and repairing the motor. The motor has two main components, called the stator and the rotor. Generally, DC motors use permanent magnets and a set of wires called windings. Permanent magnets are like any magnets and are fixed on the external fixed "stator". The stator is located just below the circular outer cover of the motor body. The rotor is fixed on the motor shaft, and the winding provides electromagnetic reaction force to make the rotor rotate in a clockwise or counterclockwise direction. The electrical energy of the winding is conducted through carbon brushes. By following the basic steps, you can check whether the DC motor is short-circuited.
Steps to testDC motors are as follows.
1 Disconnect the power to the DC motor. You should expose the bare wire that leads the power supply to the motor.
2 Use an end wrench set to remove the DC motor from any mechanical attachments of the equipment. Depending on the machine type, the bolt head can be a metric or SAE type bolt. You must be able to move the motor shaft (rotor) freely to thoroughly test the motor.
3 Connect the alligator clip leads to each motor power input wire.
4 Turn on the volt ohmmeter and switch it to the "Ohms" setting. Touch the ends of the wires together, and the meter should directly read short ohms or zero ohms.
5 Connect the other end of the alligator clip to the lead of the voltmeter. You should receive an immediate reading of approximately 10 to 100 ohms on the meter. This wide range considers the connection of carbon brushes to the rotor winding.
6 Rotate the motor shaft very slowly in either direction. As you rotate the shaft, the ohm reading on the meter should change. This ensures that the carbon brushes are in contact through the reversing plate of the rotor.
7 Remove an alligator clip from the power cord, and then contact it with the motor frame. You must find a metal part on the motor housing to see if the motor is shorted to ground. If the meter records a fully open or infinite resistance, the motor will not be directly grounded.
8 Rotate the motor shaft as in step 6. Again, the meter reading should be infinite ohms or wide open. If this is the case, the motor is fine, and perhaps a power supply problem. Check whether the power wiring is short-circuited. If the motor does indicate a short circuit or zero ohms, the end cover that hides the motor commutating plate and carbon brush must be removed.
9 Use a screwdriver to remove the end plate. The long screw can be a Philips screw or a slotted screw. These two screws will pass through the housing and enter the shaft end of the motor housing. Completely remove the screws from the motor.
10 Carefully pull open the end cap and check the wiring that supplies power to the carbon brushes. The bare copper braid may have touched the case. If so, carefully pry out the braided wire from the housing, and then retest the motor as described in step 8.
11 If the ohm test still records a reading of zero ohm or a short circuit between the winding and the motor frame, pull out the rotor from the stator part of the motor.
12 Check the condition of the rotor winding. The windings may be burnt due to overheating or the protective varnish may be damaged. This will cause a short circuit between the DC motor and the motor housing because it is first conducted through the shaft to the bearing, and then through the housing. If there is any damage to the winding, the motor must be re-wound.
Most commonly, the bare metal braided wire that supplies power to the carbon brushes is the culprit for the short circuit. Do not use tape to insulate these wires as they will become very hot during use. Melting tape may cause more problems than the short circuit itself.
